
| 일 | 월 | 화 | 수 | 목 | 금 | 토 |
|---|---|---|---|---|---|---|
| 1 | 2 | 3 | ||||
| 4 | 5 | 6 | 7 | 8 | 9 | 10 |
| 11 | 12 | 13 | 14 | 15 | 16 | 17 |
| 18 | 19 | 20 | 21 | 22 | 23 | 24 |
| 25 | 26 | 27 | 28 | 29 | 30 | 31 |
- nixos한글설정\
- 언리얼뮤지컬
- 정글사관학교
- Jinja2
- 미니프로젝트
- ossca
- EnhancedInput
- inxos
- R
- 스트림릿
- VUE
- 메모리인식불량
- 디자드
- 프메
- 파이썬서버
- pandas
- Enhanced Input System
- Bootstrap4
- 알고풀자
- 지우개신공 #pc자기진단 #ram미인식 #컴퓨터고장해결 #램인식불량 #pc자가수리 #컴퓨터고장해결 #조립pc
- 마인크래프트뮤지컬
- 으
- flask
- 블랙스크린복구
- Express
- 오픈소스
- JWT
- nixos한글키보드
- streamlit
- 판다스
- Today
- Total
Today, I will
[streamlit] 스트림릿 기초 ui부터 텍스트 및 이미지 서버 저장, Pandas를 통한 디비 시각화까지 다양한 실습 예제 본문
[streamlit] 스트림릿 기초 ui부터 텍스트 및 이미지 서버 저장, Pandas를 통한 디비 시각화까지 다양한 실습 예제
Lv.Forest 2025. 4. 16. 19:27안녕하세요. 오늘은 스트림릿 기초 문법들을 살펴보도록 하겠습니다.

import streamlit as st

with st.form('form'):
    chk1 = st.checkbox('낚시')
    chk2 = st.checkbox('골프')
    chk3 = st.checkbox('영화')
    submit = st.form_submit_button('확인')
    if submit:
        if chk1:
            st.write('낚시선택')
        if chk2:
            st.write('골프선택')
        if chk3:
            st.write('영화선택')
<버튼>
form의 경우,

form이 아닌경우

import streamlit as st


chk1 = st.checkbox('낚시')
chk2 = st.checkbox('골프')
chk3 = st.checkbox('영화')

if chk1:
    st.write('낚시선택')
if chk2:
    st.write('골프선택')
if chk3:
    st.write('영화선택')
라디오버튼

import streamlit as st
radio = st.radio(label='색상선택', options=['red','blue','yellow'])
st.write(radio)
이미지업로드
import streamlit as st
st.title('이미지 업로드')
st.file_uploader('이미지를 업로드', type=['jpg','png','jpeg'])


# pypi
# streamlit run 15Test.py
import streamlit as st
from PIL import Image
st.title('이미지 업로드')
upfile = st.file_uploader('이미지를 업로드', type=['jpg','png','jpeg'])

if upfile is not None: # 파일 업로드 후 서버로 전송됐다면,
    print('upfile type',type(upfile))
    image = Image.open(upfile) # 사용자가 전송한 이미지를,
    print('image type',type(image))
    st.image(image) #이미지 함수로 연다
<업로드한 사진을 서버에 저장하기>
# pypi
# streamlit run 15Test.py
import os
import streamlit as st
from PIL import Image
# 실제 이 파이썬 파일이 위치한 경로
real_path = os.path.abspath(__file__)
print("실제 실행 중인 파일:", real_path)

# 그 파일이 위치한 디렉토리
real_dir = os.path.dirname(real_path)
print("해당 파일이 위치한 폴더:", real_dir)

# 상위 폴더
parent_dir = os.path.dirname(real_dir)
print("상위 폴더:", parent_dir)

st.title('이미지 업로드')
upfile = st.file_uploader('이미지를 업로드', type=['jpg','png','jpeg'])

if upfile is not None: # 파일 업로드 후 서버로 전송됐다면,
    print('upfile type',type(upfile))
    image = Image.open(upfile) # 사용자가 전송한 이미지를,
    print('image type',type(image))
    print(upfile.name)
    st.image(image) #이미지 함수로 연다
    image.save(f'{parent_dir}/uploadfile/{upfile.name}') #저장
    st.success(f'서버에 저장된:{upfile.name}')

<텍스트 파일 읽어오기>

# pypi
# streamlit run 15Test.py
import os
import streamlit as st
from PIL import Image
# 실제 이 파이썬 파일이 위치한 경로
real_path = os.path.abspath(__file__)
print("실제 실행 중인 파일:", real_path)

# 그 파일이 위치한 디렉토리
real_dir = os.path.dirname(real_path)
print("해당 파일이 위치한 폴더:", real_dir)

# 상위 폴더
parent_dir = os.path.dirname(real_dir)
print("상위 폴더:", parent_dir)

st.title('텍스트 업로드')

upfile = st.file_uploader('텍스트 업로드', type=['txt'])
if upfile is not None:
    content = upfile.read().decode('utf-8')
    st.write(content) # 사용자가 업로드 된 파일을 근거로 LLM을 연동하여 그에 관한 질문과 답을 얻을 수 있을 것
✅ 코드 원본
upfile = st.file_uploader('텍스트 업로드', type=['txt'])
if upfile is not None:
    content = upfile.read().decode('utf-8')
    st.write(content)
1️⃣ st.file_uploader('텍스트 업로드', type=['txt'])
- st.file_uploader()는 Streamlit에서 파일 업로드 창을 만들어주는 함수
- '텍스트 업로드': 사용자가 볼 라벨
- type=['txt']: 확장자가 .txt인 파일만 업로드 가능하게 제한
2️⃣ if upfile is not None:
- 사용자가 파일을 업로드했을 때에만 다음 코드를 실행
- 아무것도 안 올렸다면 upfile은 None
3️⃣ content = upfile.read().decode('utf-8')
👉 upfile.read():
- 업로드된 파일의 내용을 "바이트" 형태로 읽어옴
- 예시:
- b'Hello, world!\n안녕하세요\n'
👉 .decode('utf-8'):
- 읽어온 바이트를 '문자열(유니코드)'로 변환
- utf-8은 한국어, 영어 등 다양한 언어를 안전하게 다룰 수 있는 가장 일반적인 인코딩 방식
즉, read()는 bytes 타입,
decode('utf-8')은 그걸 → str로 바꿉니다.
4️⃣ st.write(content)
- 변환된 문자열을 Streamlit 앱에 텍스트 형태로 출력
- content는 이 시점에 일반 문자열입니다 (예: "안녕하세요\n오늘은 날씨가 좋습니다").
🧪 예시 흐름
사용자가 메모.txt를 업로드하면:
안녕하세요
오늘은 GPT와 놀아봅시다
→ read() = 바이트 형태 (b'\xec\x95\x88\xeb\x85\x95\xed\x95\x98\xec\x84\xb8\xec\x9a\x94...')
→ decode('utf-8') = '안녕하세요\n오늘은 GPT와 놀아봅시다'
→ st.write() = Streamlit 앱에 텍스트 출력
📌 왜?
- 텍스트 파일은 기본적으로 "문자"가 아닌 "바이트"로 저장
- 읽은 뒤 decode()를 안 하면 깨진 문자나 오류가 나올 수 있다.
- 특히 한국어가 포함된 파일이라면 꼭 utf-8로 decode해야 안전
💡 바이트, 유니코드 정리
| bytes | 컴퓨터가 읽는 이진 데이터 | b'\xec\x95\x88\xeb\x85\x95' |
| str | 사람이 읽는 문자열 (유니코드) | '안녕' |
| .read() | 파일의 내용을 바이트로 읽음 | b'Hello\n' |
| .decode('utf-8') | 바이트 → 문자열 | 'Hello\n' |
✅ 요약
업로드된 txt 파일 → 바이트로 읽음 → UTF-8로 문자열 디코딩 → 화면에 출력
다음의 사례도 같이 생각해볼 수 있다
Q1 만약 사용자가 UTF-8이 아닌 CP949로 저장한 .txt를 올린다면?
Q2 .read().decode() 대신 .readlines()를 쓴다면?
Q3 텍스트 파일을 업로드한 뒤, 그 내용을 요약하거나 질문응답을 하기 위한 LLM 입력으로 바로 연결하는 구조는 어떻게 구성해볼지?
저장
import streamlit as st

st.title('텍스트 업로드')
upfile =st.file_uploader( '텍스트 업로드',type=['txt'])
if upfile is not None:
    content = upfile.read().decode('utf-8')
    st.write( content)
    savePath = f'{parent_dir}/uploadfile/{upfile.name}'
    fp = open(savePath, 'w')
    fp.write(content)
    fp.close()
UI
칼럼

col1, col2, col3 = st.columns(3)
with col1:
    st.header("🍕 피자")
    st.write('맛있는 피자')
with col2:
    st.header("🍣 초밥")
    st.write('맛있는 초밥')
with col3:
    st.header("🥟 만두") #https://emojipedia.org/ko/%EB%A7%8C%EB%91%90
    st.write('맛있는 만두')
col1, col2 = st.columns([2,8])
with col1:
st.time_input('컬럼1')
with col2:
st.time_input('컬럼2')
tab1, tab2 = st.tabs(['Tab A', 'Tab B'])
with tab1:
    st.write('Hello')
with tab2:
    st.write('world')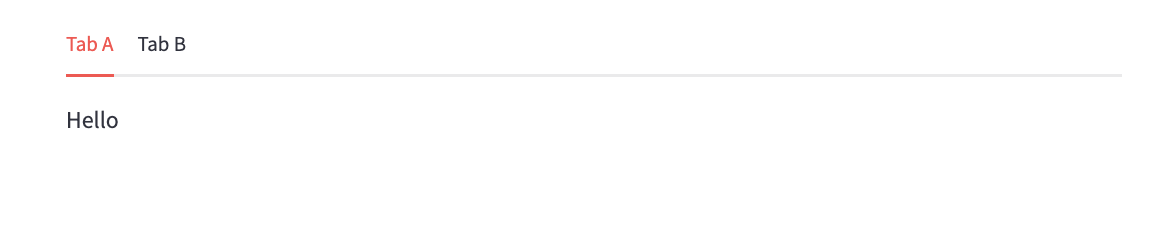
tab1, tab2 = st.tabs(['Tab A', 'Tab B'])
with tab1:
    st.write('Hello 1')
    st.write('Hello 2')
    st.write('Hello 3')
with tab2:
    st.write('world 1')
    st.write('world 2')
    st.write('world 3')
tab1, tab2, tab3 = st.tabs(['Tab A', 'Tab B', 'Tab C'])
with tab1:
    st.write('홈')
    st.line_chart('Home')
with tab2:
    st.write('통계')
    st.line_chart([10,20,30,25])
with tab3:
    st.write('설정')
사이드 바 및 입력 인풋란

st.sidebar.title('사이드바')
st.sidebar.text_input('입력')
st.title('타이틀')
st.text_input('입력...')
디비 생성 및 테이블 작성
Downloads - DB Browser for SQLite
(Please consider sponsoring us on Patreon 😄) Windows Our latest release (3.13.1) for Windows: Free code signing provided by SignPath.io, certificate by SignPath Foundation. Windows PortableApp There is a PortableApp available, but it’s still the previ
sqlitebrowser.org
# 보통의 핸드폰도 sqlite를 많이 이용!
# 표준 sql

import sqlite3
try:
    # db 있으면 접속, 없으면 db 생성 후 접속, 처음에는 test db가 없으므로 생성하고 연결
    conn = sqlite3.connect('test.db')
    # 1. 데이터 베이스를 만든다.
    # 2. 테이블을 만든다. (디비 안에 테이블은 여러개있을 수 있다.)
    # 3. 테이블에 수정 추가 삭제 등의 작업을 수행한다
    sql = "create table if not exists student(name varchar(50), age int, birth date)"
    cur = conn.cursor()
    cur.execute(sql)
    conn.commit()
    conn.close()
    print('성공')
except Exception as err:
    print("에러:", err)
디비 테이블에 데이터 insert
import sqlite3
try:
    # db 있으면 접속, 없으면 db 생성 후 접속, 처음에는 test db가 없으므로 생성하고 연결
    conn = sqlite3.connect('test.db')
    sql = "insert into student(name,age,birth) values(?,?,?)"
    cur = conn.cursor()
    cur.execute(sql,('홍길동',20,'1997-11-12'))
    conn.commit()
    conn.close()
    print('성공')
except Exception as err:
    print("에러:", err)
select를 통해 전체 데이터 확인
import sqlite3
try:
    # db 있으면 접속, 없으면 db 생성 후 접속, 처음에는 test db가 없으므로 생성하고 연결
    conn = sqlite3.connect('test.db')
    sql = "select * from student"
    cur = conn.cursor()
    cur.execute(sql )
    rows = cur.fetchall()
    print(rows)
    # conn.commit() insert, delete, update
    conn.close()
    print('성공')
except Exception as err:
    print("에러:", err)
[('홍길동', 20, '1997-11-12'), ('아이유', 20, '2000-10-05'), ('장영실', 28, '1600-08-05')]
성공
출력을 조금 더 보기 좋게
import sqlite3
try:
    # db 있으면 접속, 없으면 db 생성 후 접속, 처음에는 test db가 없으므로 생성하고 연결
    conn = sqlite3.connect('test.db')
    sql = "select * from student"
    cur = conn.cursor()
    cur.execute(sql )
    rows = cur.fetchall()
    print(rows)
    for n,a,b in rows:
        print(n,a,b)
    # conn.commit() insert, delete, update
    conn.close()
    print('성공')
except Exception as err:
    print("에러:", err)
https://pandas.pydata.org/docs/reference/api/pandas.DataFrame.plot.html
pandas.DataFrame.plot — pandas 2.2.3 documentation
sequence of iterables of column labels: Create a subplot for each group of columns. For example [(‘a’, ‘c’), (‘b’, ‘d’)] will create 2 subplots: one with columns ‘a’ and ‘c’, and one with columns ‘b’ and ‘d’. Remaining colum
pandas.pydata.org
판다스는 위. 링크 참고
디비 내용을 보기
conn = sqlite3.connect('다른 경로에 있다면 직접 or 상대 경로')
conn = sqlite3.connect('/Users/user/Documents/pj/streamlit/test.db')
sql = "select * from student"

st.title("🧾학생 목록조회")
df = pd.read_sql_query(sql,conn)
st.dataframe(df)
import streamlit as st
import pandas as pd
import sqlite3
import matplotlib.pyplot as plt
plt.rcParams['font.family'] = 'AppleGothic' //맥은 애플고딕, 윈도우는 나눔고딕
conn = sqlite3.connect('/Users/abc/Documents/pj/streamlit/test.db')
sql = "select * from student"
st.title("🧾학생 목록조회")
df = pd.read_sql_query(sql,conn)
df.columns = ['이름','나이','생일'] # 이름을 인덱스로 두고 볼 수 있음
df.set_index('이름', inplace=True)
st.dataframe(df, use_container_width=True)
st.markdown("---")
df.sort_index(inplace=True)
ax = df.plot(kind='bar', rot = 45, ylabel='나이', title='age chart by user', grid = True)
st.pyplot(ax.figure)
# plotly seaborn matplotlib 지원하는 streamlit
입력받은 값 디비에 저장하기
import streamlit as st
import sqlite3
conn = sqlite3.connect('/Users/abc/Documents/pj/streamlit/test.db')
#conn = sqlite3.connect('test.db') 경로에 db가 있어야 함!
def insertData(name, age, birth):
    try:
        sql="insert into student(name,age,birth) values(?,?,?)"
        cur = conn.cursor()
        cur.execute(sql, (name,age,birth) )
        conn.commit()
        return '추가성공'
    except Exception as err:
        return f'실패:{err}'

with st.form('myform'):
    name = st.text_input('이름:')
    age = st.number_input('나이:',value=0, step=1,
                           min_value=0, max_value=100 )
    birth = st.date_input("생일:")
    submit = st.form_submit_button('확인')
    if submit:
        s = f'이름:{name} 나이:{age} 생일:{birth}'
        st.write( s )
        rst = insertData(name, age, birth)
        st.success(rst)
메뉴설정
https://github.com/victoryhb/streamlit-option-menu
GitHub - victoryhb/streamlit-option-menu: streamlit-option-menu is a simple Streamlit component that allows users to select a si
streamlit-option-menu is a simple Streamlit component that allows users to select a single item from a list of options in a menu. - GitHub - victoryhb/streamlit-option-menu: streamlit-option-menu ...
github.com
한 뒤에

메뉴의 아이콘은 부트스트랩 아이콘을 보면 된다.
https://icons.getbootstrap.com/
Bootstrap Icons
Official open source SVG icon library for Bootstrap
icons.getbootstrap.com
selected = option_menu(
    menu_title=None,
    options=["홈", "소개", "설정"],
    icons=["house", "info-circle", "gear"],
    menu_icon="cast",
    default_index=0,
    orientation="horizontal",
)

if selected == "홈":
    st.title("🏠 홈 페이지")
elif selected == "소개":
    st.title("ℹ️ 소개 페이지")
elif selected == "설정":
    st.title("⚙️ 설정 페이지")
import streamlit as st
def home(name="고객님", age=20):
    st.title("🏠 홈")
    st.write(f"안녕하세요!{name}")
    st.write(f"반갑습니다. {age}")
import streamlit as st
from streamlit_option_menu import option_menu
import home
selected = option_menu(
    menu_title=None,
    options=["홈", "소개", "설정"],
    icons=["house", "info-circle", "gear"],
    menu_icon="cast",
    default_index=0,
    orientation="horizontal",
)
if selected == "홈":
    home.home()
elif selected == "소개":
    st.title("ℹ️ 소개 페이지")
elif selected == "설정":
    st.title("⚙️ 설정 페이지")
import streamlit as st
from streamlit_option_menu import option_menu
# 사이드바 메뉴 구성
with st.sidebar:
    selected = option_menu(
        menu_title="메인 메뉴",
        options=["홈", "소개", "설정"],
        icons=["house", "info-circle", "gear"],
        menu_icon="cast",
        default_index=0,
    )

if selected == "홈":
    st.title("🏠 홈 페이지")
    st.write("여기는 홈입니다.")
elif selected == "소개":
    st.title("ℹ️ 소개 페이지")
    st.write("이 앱은 Streamlit과 streamlit-option-menu로 제작되었습니다.")
elif selected == "설정":
    st.title("⚙️ 설정 페이지")
    st.write("설정 항목을 여기에 표시할 수 있습니다.")
유튜브 비디오 출력
st.video('https://youtu.be/JZk-2q22aOQ?si=WfM1SDEU_4f52PcD')디비에 이미지 저장하기
sqlite에서 테이블을 먼저 만들어준다.

Streamlit + SQLite를 이용해서 수신된 이미지를 DB에 저장하는 전체 흐름
-데이터 컬럼 타입: blob
import streamlit as st
from PIL import Image
import os
import sqlite3
conn = sqlite3.connect('test.db')
def insertData(imgname, imgdata):
    try:
        sql="insert into imgtest(imgname,img) values(?,?)"
        cur = conn.cursor()
        cur.execute(sql, (imgname,imgdata) )
        conn.commit()
        return '추가성공'
    except Exception as err:
        return f'실패:{err}'
st.title('이미지 업로드')
upfile =st.file_uploader( '이미지를 업로드',type=['jpg','png','jpeg'])
if upfile is not None:
    image = Image.open(upfile)
    st.image( image)
    rst = insertData(upfile.name, upfile.read() )
    st.success(rst)
서버에 이미지 저장하기
import streamlit as st
from PIL import Image
import os

st.title('이미지 업로드')
upfile =st.file_uploader( '이미지를 업로드',type=['jpg','png','jpeg'])
if upfile is not None:
    print('upfile type', type(upfile))
    image = Image.open(upfile)
    print( 'image type', type(image))
    print( upfile.name )
    st.image( image)
    image.save( f'uploadfile\{upfile.name}' )
    st.success(f'서버에 저장됨:{upfile.name}')
#파일에 저장
import streamlit as st
from PIL import Image
import os
st.title('이미지 업로드')
upfile =st.file_uploader( '이미지를 업로드',type=['jpg','png','jpeg'])
if upfile is not None:
    image = Image.open(upfile)
    st.image( image)
    image.save( f'uploadfile\{upfile.name}' )
st.success(f'서버에 저장됨:{upfile.name}')'Computer Science > 인공지능,딥러닝' 카테고리의 다른 글
| [Rag, OpenAI] RAG 기반 오만과 편견 챗봇 구축하기 (LangChain + OpenAI + Streamlit) (0) | 2025.04.30 |
|---|---|
| Naive RAG, 라마인덱스 간단 구성 (0) | 2025.04.28 |
| [OpenAI API] LLM 스트리밍 API (stream=True) (0) | 2025.03.17 |
| [OpenAI API] Completion mode vs Chat mode 차이점과 Chat mode 키워드 정리 (0) | 2025.03.17 |
| 허깅페이스 한국어 데이터셋 (1) | 2024.11.12 |

